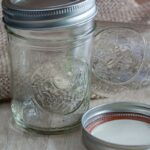
The Twelve General Steps for Hot Water Canning
This is a general guide for how to start canning food at home. It is a great overview of the process and will help prepare you to follow any amazing canning recipe you decide to try!
Equipment
- Granite Ware Covered Preserving Canner
- Canning Tool Kit
- Canning Jars
- Metal Lids & Bands
- Measuring Cups and Spoons
- General Kitchen Tools
Instructions
- Wash the empty jars. Jars need to hot before filling with hot liquid, and processing in the water bath. Even though they are tempered there is the possibility of them breaking due to thermal shock. Either use the dishwasher to sanitize and keep hot, or wash by hand and place in canning pot as water is beginning to boil.
- Start heating water in the canning pot. This large amount of water takes a while to heat up, so its good to get it going early while you work on the other steps.
- Prepare your food according to the recipe you're following.
- Once jars are hot and sanitized, place them somewhere they won't tip over or slide while filling them. Raw pack or hot pack the clean, hot jars - leave appropriate headspace.
- Using a funnel if needed, ladle or pour boiling brine, syrup, fruit juice or water over the food - leave appropriate headspace.
- Using a wooden or plastic utensil, get out all the air bubbles that may be trapped and then top off with liquid if necessary - leave appropriate headspace.
- After the jars are filled, make sure all the jar rims are clean by wiping them with a clean damp towel. This is important because if the jar rim isn't clean it may not seal properly.
- Place the lid with seal centered on top of the jar and secure with the ring, tightening only fingertip tight. It does not need to be screwed down as tight as you can.
- As you fill and lid each jar, place them on the canning rack that is set above the heated water. The jars shouldn't be touching. Once the rack is full, lower it into the water. The jars should be under at least 1" of water. Cover the pot with the lid and bring the heat up to medium-high to get the water boiling. Once it is boiling, start the timer and process the jars according to your recipe's directions.
- Once the time is up, take off the lid and allow the jars to sit in the pot for 5 mins before removing.
- Finally, remove the jars and place them on a cooling rack or towel to cool - make sure you leave space between the jars so air can get all around them. Allow to cool for at least 12 hours before checking the seal.
- Last of all, after 12hrs check the seals. You can do this by pressing the center of the lid. If the lid can be pressed down and pops back up after, your jar didn't seal. But don't worry, you can store that jar in the fridge and eat the contents within 2-3 days, or place the jar in the freezer for longer keeping. The jar contents can also be reprocessed in a new clean jar with a new lid within 24hrs.
- The jars that did seal can be put in the pantry in a cool, dry place and stored for up to a year. Make sure you label with what the contents are and when they were canned!
Notes
Intro to Canning Terms
Raw/Cold pack - when you put prepared, but raw/uncooked food (like fruits or veggies) into the jars and then pour a hot liquid (like brine, syrup, fruit juice, or water) over the top of before processing.
Hot Pack - when you put pre-cooked food into the jar for processing (like marinara sauce). Headroom/Headspace - the distance left between the top of the food and the top of the jar. It is important for processing, not to leave too much room or too little room. Follow the recipe! Information for this guide was found in Ball's Blue Book - Guide to Preserving, Better Homes and Gardens New Cook Book, and lastly, The Backyard Homestead edited by Carleen Madigan. For best results and shelf-stable food, always follow tested recipes exactly!
Hot Pack - when you put pre-cooked food into the jar for processing (like marinara sauce). Headroom/Headspace - the distance left between the top of the food and the top of the jar. It is important for processing, not to leave too much room or too little room. Follow the recipe! Information for this guide was found in Ball's Blue Book - Guide to Preserving, Better Homes and Gardens New Cook Book, and lastly, The Backyard Homestead edited by Carleen Madigan. For best results and shelf-stable food, always follow tested recipes exactly!
