Crafting Homemade Croissants: A True Labor of Love and Dedication.
Originally Published 08/21/2020
I started to get worried about posting this recipe. How to not scare people away with the two-day time stamp, and the decently wordy instructions. Croissants are a slow food. What can I say?
They take time to make, but don’t let that dissuade you! As with most good things in life, you get out what you put in and these are worth the investment!
I think the flakey layers are magic and the taste is divine! If you get some time, I urge you to try making them for yourself!
I’m here to guide you through it step by step, ensuring your kitchen fills with the aroma of freshly baked French bakery-style croissants. I hope to make this process as enjoyable and straightforward as possible!
(Pre Recipe Note: I like to use a kitchen scale to weigh out my ingredients, it just ends up being a little more accurate. If you don’t have a scale though, I’ve provided the other measurements, which are close approximations of the scale weights.)

Starting with a Micro-Poolish:
- Begin by creating a quick micro-poolish. Wondering what “poolish” means? According to bakerpedia, a “poolish is a highly fluid yeast-cultured dough. It’s a type of preferment traditionally used in the production of French bakery products.” In other words, it’s equal parts flour, and water with some yeast added.
- For my croissants, mix 200g warm water, and 10g yeast, and then pour 200g all-purpose flour over the top. The flour insulates the yeast and warm water. This mixture lets the yeast activate in just ten minutes.
Mixing the Dough:
- Once your poolish is ready, it’s time to add the rest: melt butter (I prefer the microwave for this), then mix in warm water and eggs to keep everything at a friendly temperature.
- Combine until the dough is just right — not too sticky, not too dry. Shape it into a ball, and let it rise for 1 to 1.5 hours.
Preparing for Baking:
- After the dough has risen, divide it into two rectangles, flatten it, wrap it tight, and chill for an hour.
- While the dough is resting in the fridge, prepare your butter blocks. Quality butter (like KerryGold) makes a difference for that perfect flake and rise.
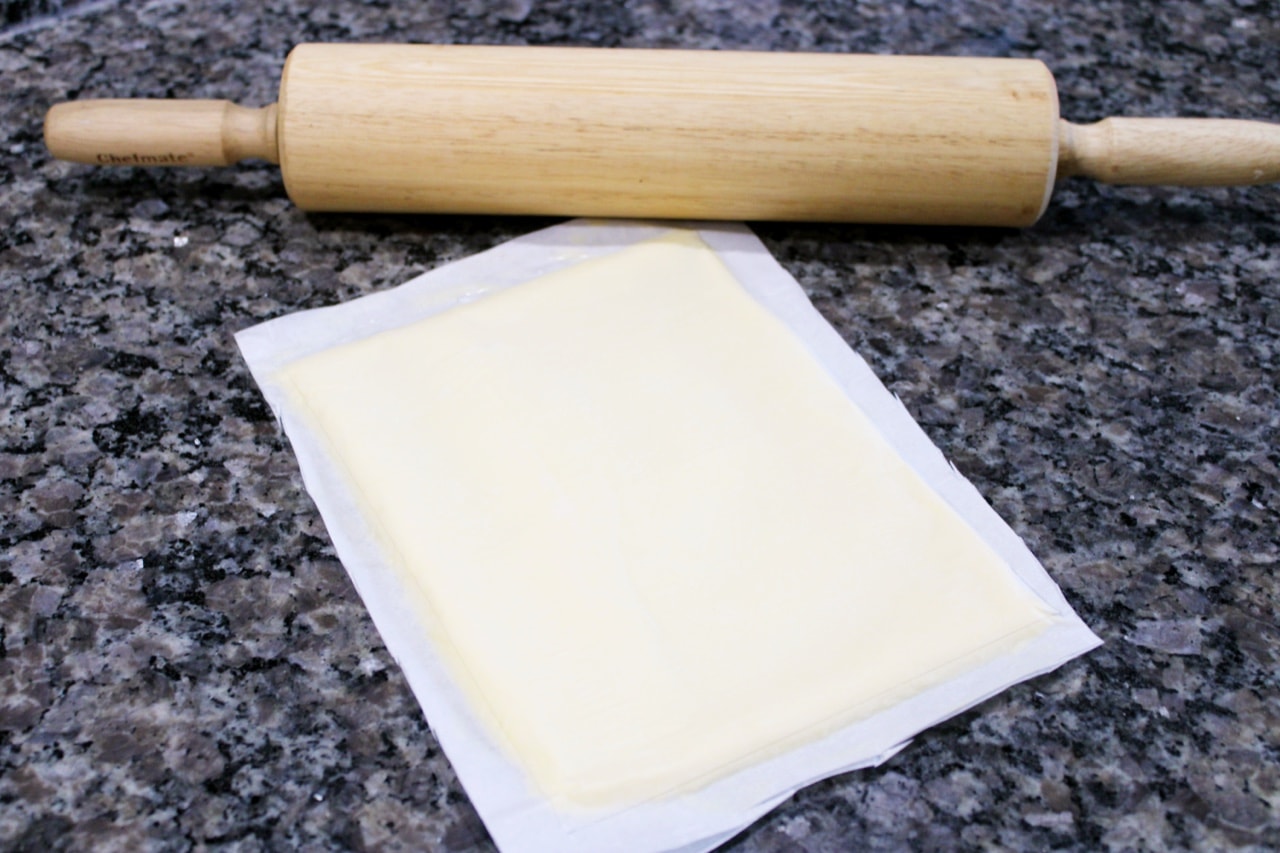
- You will need 4 sheets of parchment paper. Draw an 8″x6″ rectangle on the top of two sheets. Roll your butter between two sheets of parchment paper to fit the rectangle, and chill again.
Layering and Shaping:
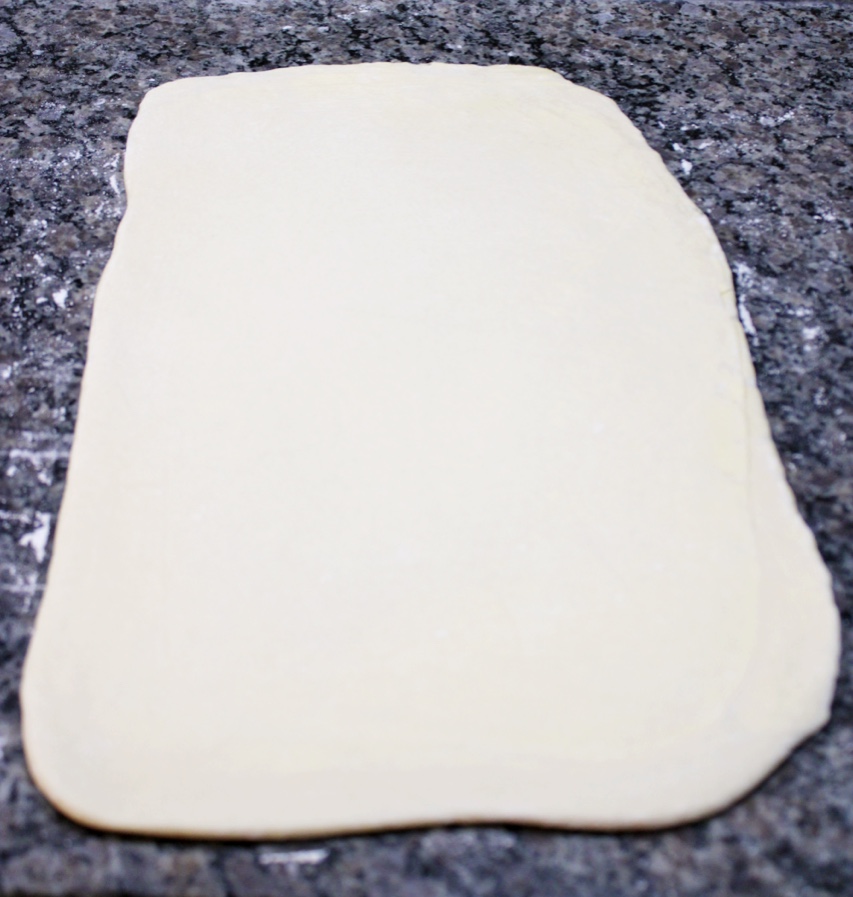
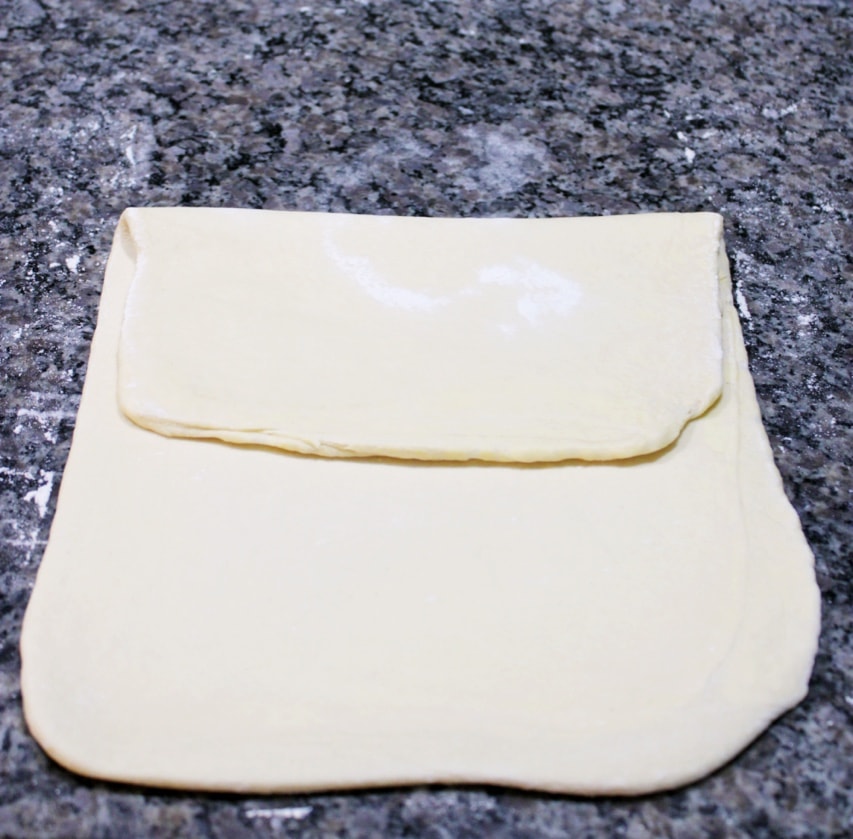
- For the first turn, flour your counter and then roll the dough out until it is 16″x7″. Then place a butter block on one half of the dough. Fold the other half of the dough over to encase the butter and roll out the dough again, this time to a 20″x7″ rectangle.
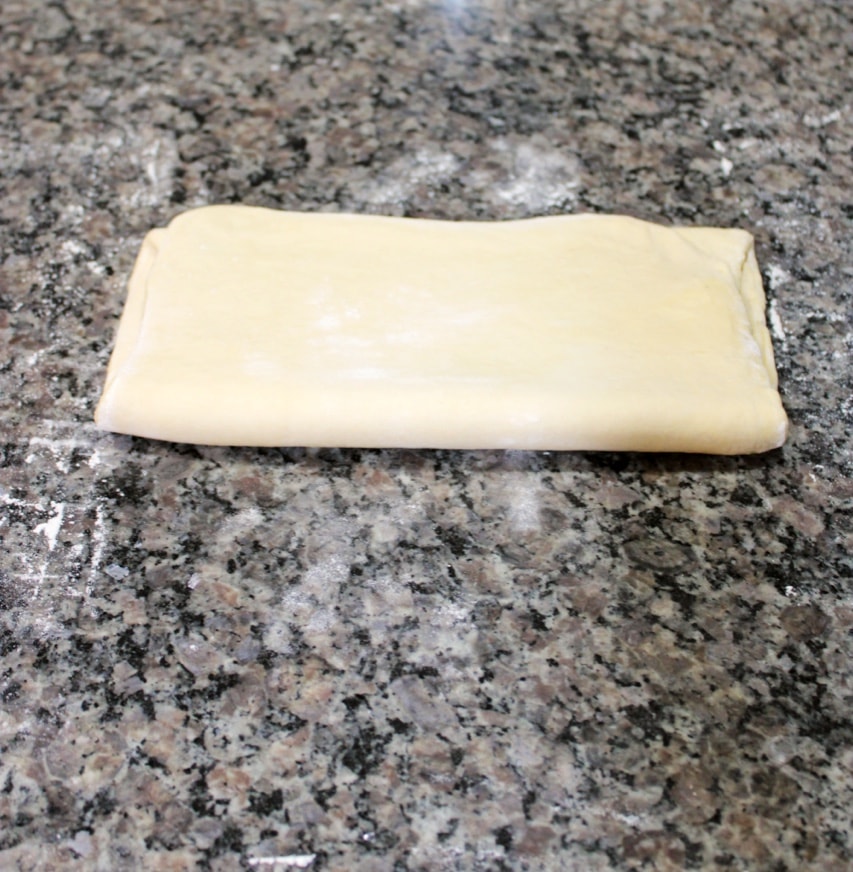
- After this, fold one end into the center and then fold the other side over the top of that to create a book
- You’ve created your first turn. Wrap the dough tightly again and place it back in the fridge to chill for another 45 minutes.
- Second Turn: Roll the dough out again to a 20″x7″ rectangle and fold it back over itself into the shook shape. Re-wrap it with plastic wrap and put it back in the fridge overnight.
Insider Tips:
- Always keep your counter extremely well-floured to prevent the dough from sticking and tearing holes in your layers
- Quality Ingredients: Invest in good butter for flakier croissants.
- Work fast! Heat is the enemy of layers.
- Patience Pays Off: Don’t rush the rising and chilling steps.
- If you go to roll out the dough on the second, or third turns and it looks like parched desert sand, stop rolling and allow it to warm up for 5 minutes. This happens when the dough and the butter are at different temperatures and it will create uneven layers when you bake your croissants.
- After the second turn, wrap the dough up really good because it will continue to rise in the fridge overnight. Speaking from experience, dough that busts through the plastic wrap will dry out and you’ll have to throw it away.
The Final Countdown: Achieving Croissant Perfection on Baking Day.
- Give your dough one last turn, rolling it out, folding it on itself and then it goes back in the fridge one last time for another 30-45 minutes.
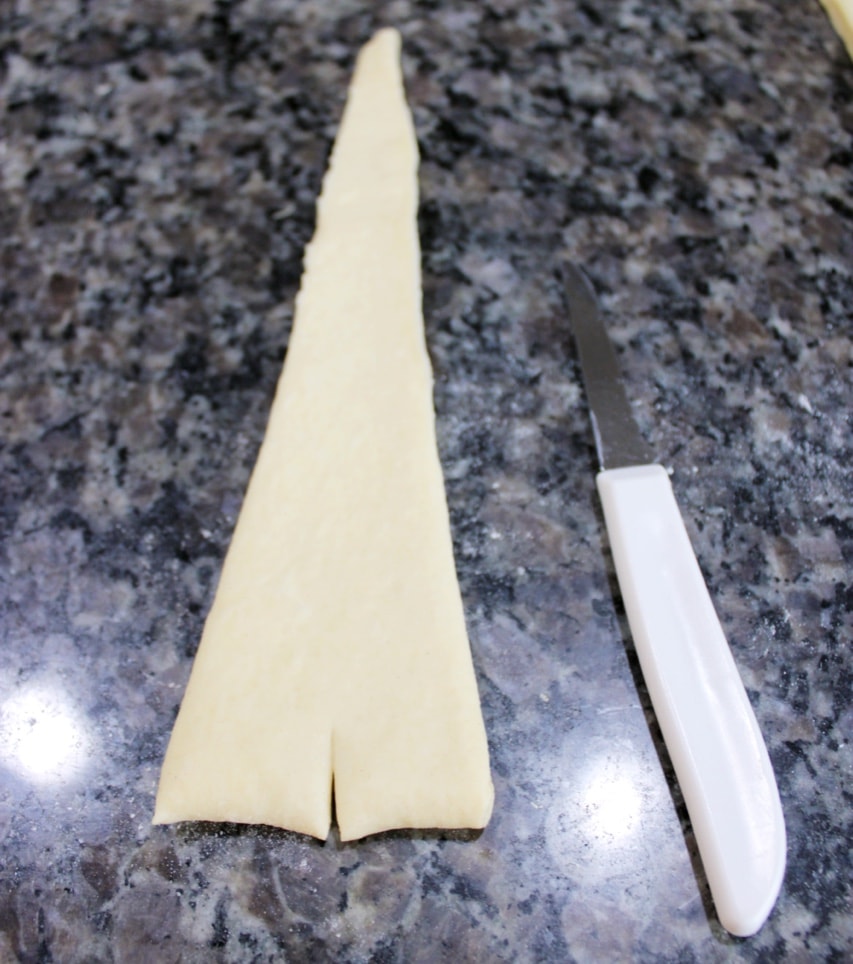
- Roll the dough back out into a 20″x7″ rectangle and mark it every 3 1/2″ to create 9 triangles, plus two half triangles on the ends for a total of 10 croissants per dough sheet.
- Use a pizza cutter to cut out the triangles
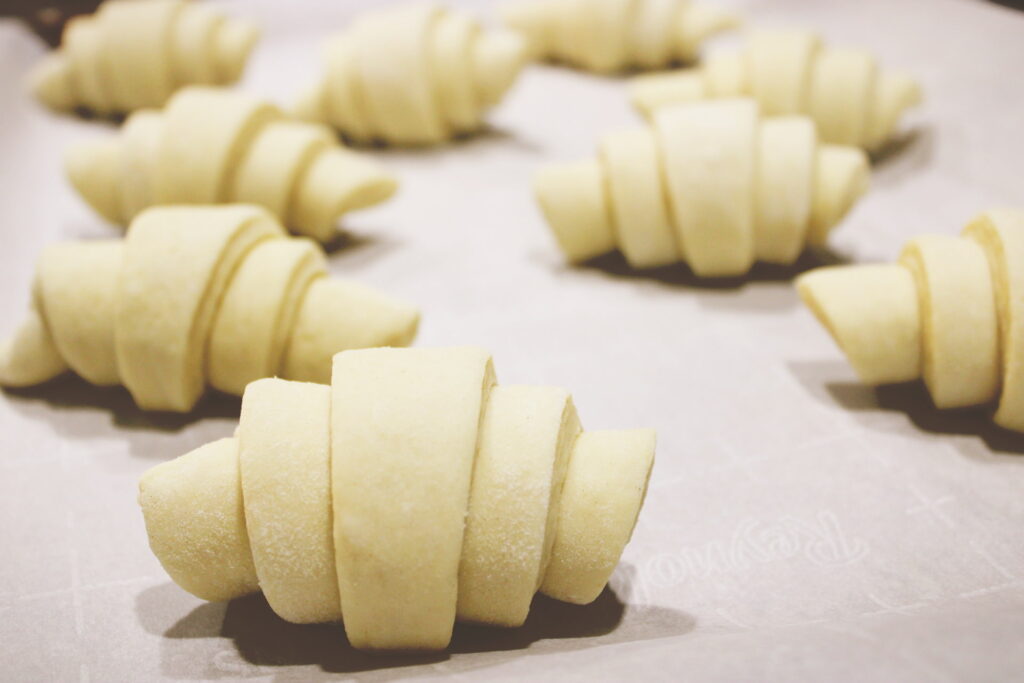
- Make a 3/4″ cut in the middle of the croissant base before rolling, and then roll up. Repeat with all 20 croissants.
- Place on baking sheets, cover and let rise 1-2 more hours.
- They’re risen when you poke one and the indentation stays there. They will look puffy, and somewhat jiggly.
- Gently egg wash and bake the trays one at a time at 375° for 18-20 mins, or until golden brown.


Eat 10 of them by yourself.
Technically, you’re supposed to let them cool for 30 minutes before eating. But let’s be serious, once they’re cool enough to touch you better try a bite!
There’s something incredibly rewarding about making croissants at home. Yes, it takes time and patience, but the result is undeniably delicious and fulfilling. Imagine breaking open a warm, buttery croissant that you made from scratch. This isn’t just baking; it’s creating a moment of joy, a taste of France in your kitchen.
Enjoy the process, and welcome the delightful challenge of homemade croissants. They’re not just treats; they’re your culinary masterpiece. Happy baking!
Croissants
Equipment
- Measuring Cups and Spoons
- Kitchen Scale
- Mixing Bowls
- Rolling Pin
- Kitchenaid Mixer
- Rubber Spatula
- Ruler
- Knife
- Pizza Cutter
- Two Sheet Pans
- Pastry Brush
- Plastic Wrap
- Parchment Paper
Ingredients
Croissant Dough
- 200 grams All Purpose Flour 1 1/2 Cups
- 200 grams Warm Water 1 Cup
- 10 grams Yeast 3 1/2 tsp
- 475 grams Bread Flour 4 Cups
- 76 grams Sugar 1/4 Cup + 1 tbsp
- 30 grams Salted KerryGold Butter 2 tbsp
- 90 grams Warm Water 1/2 Cup
- 2 Eggs
- 11 grams Salt 2 tsp
Butter Block
- 300 grams Salted KerryGold Butter divided 2 sticks of butter + 6 tbsp
Egg Wash
- 1 Egg Mix with 1 tsp water
Instructions
Day One
- In your Kitchenaid mixing bowl, pour in the warm water and sprinkle the top of the water with yeast, then pour the all-purpose flour over the top of the yeast. Let this sit for around 10 mins. When the flour on top starts to look cracked, you will know the yeast is active.
- While the yeast is activating, in a separate bowl, weigh/measure out and combine bread flour, sugar, and salt. In another bowl melt the butter in the microwave for 30 seconds, then add the warm water and eggs. Stir this mixture together, make sure it is warm to the touch.
- Once your yeast mixture has sat the appropriate amount of time, first add in the water, butter, egg mix. Using your bread hook attachment, turn on the mixer briefly to combine. Then add the flour, sugar, salt mixture, turn mixer back on, and run on level two until all dry ingredients are incorporated. The dough will look rough, but it shouldn’t be extremely runny, sticky, or too dry. If necessary add small amounts of water, or flour to correct.
- Take the dough from the mixing bowl and shape it into a ball, placing it in another large bowl. Sprinkle the top of the dough lightly with flour and cover the bowl with plastic wrap. Let the dough sit in a warm place for 1- 1 1/2 hours to rise.
- After the dough has risen, deflate the dough. Using the kitchen scale, divide the dough into two equal parts. Then shape these two parts into flat, rough rectangles, to where the dough is about an inch thick. Wrap these each in their own plastic wrap and put them in the fridge for an hour. Once your dough is chilling in the fridge, it’s time to shape the butter blocks. Using four smaller sheets of parchment paper, mark out an 8″ by 6″ rectangle on two of them. Divide the butter, placing 1 stick plus 3 tbsp each on the unmarked parchment paper. Lay the marked parchment paper on top of the butter, and using a rolling pin, tap and roll the butter out until it fills the 8″x6″ rectangle. Place both butter blocks in the fridge to chill while dough finishes chilling.
- When the hour is up you are now ready to start the dough’s first turn! One at a time, take the chilled dough out of the fridge and unwrap it, placing it on a very well-floured surface, roll out a rectangle that is 16″x7″. Croissant dough works best if kept cold so you need to move quickly. Once your dough is rolled out, take a butter block out of the fridge and place it on half of the rolled-out rectangle. Fold the top half of the dough over the butter, encasing it in the dough. Then proceed to roll the dough out once more until it is about 20″ long by 7″ wide. Make sure to keep your countertop well floured to prevent the dough from sticking and tearing. Once it is rolled out long enough fold one end into the center and fold the opposite end over the top, making a book. Wrap the dough in plastic wrap and place it back in the fridge for 30-45 mins to cool back down. Repeat with the second set of dough/butter block. Now you’ve completed the first of three turns!
- After 30-45 mins, one at a time bring back out your croissant books and on a well-floured counter, roll them each back out again until they are 20″ long and fold back into a book, re-wrap and place back in the fridge. You’ve completed your second turn and the dough is ready to rest in the fridge overnight! ****
Day Two
- On the second day, get your dough out of the fridge and give it one more turn. Roll it out on a well-floured surface, to 20″ in length and fold one end in and the other over the top of it like the previous two turns. Return it to the fridge for another 30-45 minutes. This is your last turn.
- Once the dough has been properly chilled for the last time, get the dough out and on a well-floured surface roll your dough out one final time, 20″x7″. The dough will want to shrink back, so roll it out just a little longer and wider than what you want to compensate for that.
- Mark the dough every 3 1/2″ to make 9 whole triangles and half a triangle on each end that will be put together to make the tenth croissant. Using a pizza cutter (or knife) cut the triangles. Before rolling the croissants up, cut a small 1/2″ cut in the center of the base of the triangle. This will allow for the croissant to roll up better. Roll all 20 croissants, placing them 1″ apart on your parchment-lined baking trays. Cover with plastic wrap and allow to rise 1-2 hours. You’ll know they are ready to bake when you gently poke the dough and your finger print does not bounce back out.
- Preheat oven to 375 degrees. Make the egg wash by mixing a tsp of water in with a beaten egg. When the croissants are fully risen, gently brush each one with egg wash, being careful not to accidently deflate. Bake trays of croissants one at a time for 18-20 minutes, or until they are a nice golden brown color. When they are done, remove from tray and allow to cool for 30 minutes before eating. *
Notes
Affiliate Information
As a part of the Amazon Affiliate program, I have the opportunity to share products and items that I genuinely find useful or interesting. When you come across links to these products on my blog, they're not just recommendations based on my personal experience or research; they also serve a dual purpose. If you decide to click on these links and make a purchase, I earn a small commission from Amazon at no additional cost to you.
This setup helps me to keep generating content that you find helpful and engaging, without bombarding you with irrelevant ads or sponsors. It's a win-win situation: you discover products that could add value to your life, and I get a little support to continue doing what I love. Rest assured, the integrity of my recommendations remains my top priority. I only share links to items that I believe in, and that I think could make a difference for you.
Thank you for your support and understanding. Your trust means the world to me, and I'm committed to maintaining transparency about how I fund my blog. If you have any questions about the Amazon Affiliate program or how it works, feel free to reach out.
©️ 2024 Now From Scratch | Template by Maya Palmer Designs | ©️ Photos by Austin Claire Photography| Privacy Policy | Terms

